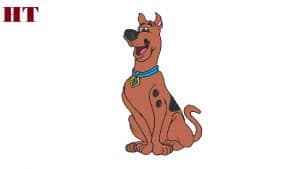
How to draw scooby doo easy with this how-to video and step-by-step drawing instructions. How to draw cartoons for beginners and kids.

Please see the drawing tutorial in the video below
You can refer to the simple step-by-step drawing guide below
Step 1
Start by drawing the Scooby’s muzzle. Draw a curved, inverted triangle for the nose and use the curves to surround the two parts of the upper lip. Draw two ovals above the muzzle to form an eye. Draw a circle within a circle inside each circle and shade between them to form a pupil.
Step 2
Draw Scooby’s head. Use the curves to surround the open mouth, tongue and lower jaw. Note the three lines at the corner of the jaw that represent the folds of the skin. Use curves to outline the forehead, ears and neck. Draw curved shapes to form the eyebrows, and surround a triangle to detail the inner ear.
Step 3
Complete Scooby’s neck with a curve. Then use three curves to surround his collar. Draw a diamond in a diamond just below the collar, forming the name tag. Outline the letters “SD” on the surface of the card. Connect the card to the collar by pair of curves.
Step 4
Use a long curve to outline Scooby’s back. At the base of the back, outline the hips and legs. Use the overlapping curves to form an irregular triangle.
Step 5
Extend an “S” line from the hip and duplicate it back to form a tail.
Step 6
Draw Scooby’s front legs with long curves. Pay attention to sharp points on shoulders and ankles. Close your feet with “C” lines to form your toes. Also, attach toes along the back foot.
Step 7
Extend a long curve from the collar to the front legs to outline the chest and stomach of Scooby.
Step 8
Use long curves to trace Scooby’s forelegs. Close your feet with “C” lines to form your toes.
Step 9
Use a series of curves to draw Scooby’s legs and hind legs. Attach a few points on the back and shoulders.
Step 10
Color Scooby Doo. He is usually brown with black spots and a blue collar.


