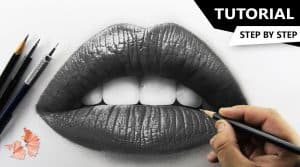
How to draw realistic Lips with this how-to video and step-by-step drawing instructions. Pencil drawing tutorials for beginners and everyone.

Please see the drawing tutorial in the video below
You can refer to the simple step-by-step drawing guide below
Step 1
In this step, we have to draw a basic outline for the lips so that we know where to set the shadows and highlights. All you need is just a sketch to prepare all your shading details. I recommend using a regular 2H pencil for tutorials. Remind yourself NEVER HIGHT HARD with this pencil as it leaves unwanted invisible marks when you paint over it with darker shadows.
Step 2
We’ll then start adding additional details before we start doing the initial shader work. The large whites you see are the highlights that you must avoid shading.
Step 3
Next, we can start shading! This can be a tedious procedure as shading can require a lot of time and patience. Take your time and add only the first layer of the shades.
Step 4
We’ll go ahead and darken the shadows that were seen in my reference image. Add more layers of shadow as you work, gently adding subtle lines on the lips. By adding very bold lip lines, you’ll create a lip that looks aged and dry, which is a big ‘no’.
Step 5
Finally, using a tissue, continue adding shades and mattes, to create a richer and richer texture for the lips. It can take some time to achieve realistic looking textures as the graphite really depends on how you use them. I hope you guys enjoyed this tutorial as much as I did. Thanks so much for joining me and don’t forget to leave feedback on your progress!


