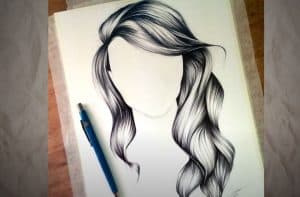
How to draw Realistic Hair Girl easy with this how-to video and step-by-step drawing instructions. Pencil drawing tutorials for beginners and everyone.

Please see the drawing tutorial in the video below
You can refer to the simple step-by-step drawing guide below
Step 1
The best way to make the process of learning how to draw realistic hair easier is to prepare for it properly.
To do this, you will need a light pencil for this first step, as you will be drawing the part of a mannequin head that you will draw hair on.
Using our reference image as your guide, carefully draw the contour of the head sitting on the neck with your pencil.
Step 2 – Start drawing the hairline
For step 2 of your actual hair drawing, you can technically start drawing with a pen, but I recommend using a pencil for now as this step can be quite complicated.
This is the part that you will want to refer to very closely with the reference image as you draw. Try your best to draw the hairline as shown in the picture.
Then, carefully erase any part of the head contour where the hair will be obscured.
Step 3 – Refer to the image to plan the next steps
The reference image for step three has arrows to show you the direction the hair will flow in the next few steps.
You don’t have to draw these arrows over your image, but this image will be of great help in correcting the flow. However, you can draw them with a very light pencil if it helps!
Step 4 – Start drawing the flow of the hair
Referring closely to the image in step 3, you can start drawing thicker lines on the left side of the hair.
To do this, start drawing some thicker lines as they appear in the reference image, using the flow arrows as your guide to make sure they rest naturally on the hair.
Step 5 – Finish drawing the thicker lines
Continuing from the previous step, we will draw thicker lines on the right hand side of your actual hair drawing.
Again, carefully follow the arrows in the reference images to get good flow.
Step 6 – Start drawing some smaller lines
The thicker lines you’ve drawn will give some depth and volume to the hair, and in this step of the realistic hair tutorial, we’ll draw some fine, small lines.
You should try to use a very sharp pen or pencil for these lines. The previous arrows will also guide you along these lines, so be sure to watch it carefully!
Step 7 – Continue drawing some thin hairs
You are understanding it now!
For this part of your actual hair drawing, simply continue drawing more fine lines for the upper right part of the hairstyle.
Step 8 – Finishing the Thin Lines
You are almost done with drawing the thin lines for your actual hair drawing and in this step you can finish the element.
Just continue drawing these lines to the end of the hair, following the arrows and reference images.
Once done, you can add more lines as you like, but just remember to keep the flow consistent!
Step 9 – Draw some stray hairs
Before you start coloring in your drawing, we’ll add some final details in this step of our tutorial on how to draw lifelike hair.
First, draw some thin and stray hairs out of the hairstyle. This part is pretty optional, as while these strands create a more realistic look, you can use less or none at all for a cleaner look.
Finally, be sure to use the pen to go back all the last lines and then erase all the remaining pencil lines.
It was a hard drawing challenge, so now you can let your hair down with a little fun color! This is the step where you can unleash your creativity on your lifelike hair painting.
You can choose any color you love for the finish, and you have plenty of options at your disposal.
Will you dye it to look like your own hair, or will you create your dream hairstyle using your color?
You can also have a lot of fun using your favorite art mediums to make colors pop. Whether you use paints, watercolors, crayons, crayons or anything else, we know it will look amazing!


