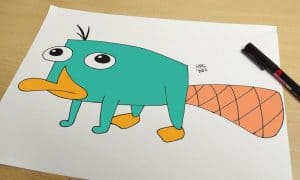
How to Draw Perry the Platypus from Phineas and Ferb with this how-to video and step-by-step drawing instructions. Cartoon Drawings for beginners and kids.

Please see the drawing tutorial in the video below
You can refer to the simple step-by-step drawing guide below
Step 1
Start with an elongated egg-like shape for the frame of the Perry Platypus. You would then draw a line for his tail and then guide lines for his face or bill.
Step 2
Next, using the face guides you drew in step one, start drawing two circles for his eyes, then add the pupils and shading them. You will then start drawing outlines and shapes before leaving this step.
Step 3
Now that your drawing is almost done, you’ll start drawing the body lines for Perry the Platypus like you see here. His body is almost like a round box. The lever shape you see at the top of his butt is his leg. To close this step, you will draw out the remainder of Perry’s bill.
Step 4
In this step, you will complete Perry’s body, including its front legs and large flat tail. Sketch a few sections of his hair and then color them in.
Step 5
draw out his back foot and then his flat back foot. Draw waffle lines on its tail and then start erasing all the guides that you drew in step one to clean up your drawing.
Step 6
This is what your character will look like when you’re done and you just finished this tutorial on “how to draw Perry the Platypus from Phineas and Ferb step by step”. Color him and you are ready.


