How to draw Naturo easy with this how-to video and step-by-step drawing instructions. Cartoon drawing tutorials for beginners and kids.
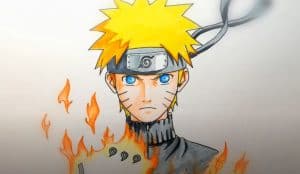
Please see the drawing tutorial in the video below
You can refer to the simple step-by-step drawing guide below
Step 1
Start by drawing a large circle. This will form Naruto’s face.
Step 2
Below the circle, continue to outline the face by enclosing a shape using a curved line.
Step 3
Delete the guide line created by the original circle.
Step 4
Draw a curved line on the top of the face. Draw two short lines connecting the long line to the sides of the face.
Step 5
Delete the guides created by the original circle.
Step 6
Use a long, curved line to wrap Naruto’s headband over his face. Allow the line to be wavy on the sides to represent ripples in the fabric.
Step 7
Draw Naruto’s ears by attaching elongated ovals on each side of his head.
Step 8
Detail the ears using a series of curved, interconnected lines. Draw eyebrows extending from below the headband. Each eyebrow consists of two curved lines that meet at a point.
Step 9
Draw Naruto’s eyes. Start by drawing two curved lines below the eyebrows. On one side, allow the lines to meet at one point; otherwise, connect them with a short, straight line. Shade the enclosed shape. Draw a circle below this one, with two smaller circles inside. Shade the small circle in the center. Finally, draw a curved line below the eye.
Step 10
Repeat this process on the opposite side to form a mirror image.
Step 11
Draw three curved lines through each cheek. Define the nose by drawing two dots in the center of the face. Draw a straight, upturned line at each end, to indicate the mouth.
Step 12
Draw a rounded rectangle in the headband.
Step 13
Draw the Konoha icon in a rectangle. This symbol consists of a spiral with a straight line extending from the end and a triangle extending from the opposite side. Draw three small circles on each end of the rectangle.
Step 14
Draw the neck by extending two straight lines down from the face. Detail the neck using two short diagonal lines.
Step 15
Draw Naruto’s hair. Below each ear, extend a series of short and curved lines that meet into jagged points.
Step 16
Draw Naruto’s clothes. To do this, draw two tall, rounded rectangles below the neck. Join the rectangles at the top using a short curved line and extend a series of connected curves outward from each rectangle.
Step 17
Use a long, wavy line to wrap the collar. Draw a zigzag line between the two rectangles. Shape the fabric by drawing long and short curved lines.
Step 18
Extend curved lines from the collar to the edge of the page. Draw vertical curves to give details to the outfit.
Step 19
Give Naruto a full head of hair by drawing a series of pointed, connecting lines across his head.
Step 20
Color Naruto. He is often depicted with blonde hair, blue eyes, and blue and orange clothes.

No Responses