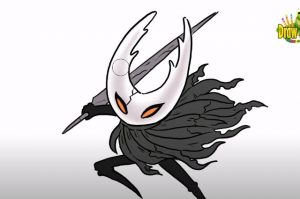
How To Draw Hollow Knight easy with this how-to video and step-by-step drawing instructions. Easy drawing tutorial for beginners and kids.

Please see the drawing tutorial in the video below
You can refer to the simple step-by-step drawing guide below
Step 1
To start the Hollow Knight, we will first need to draw a simple circle for his head.
Step 2
Next, draw two small legs that are each pointed at the bottom of the knight’s head.
Step 3
Now we need to give our bug knight two curved horns on top of its head.
Step 4
To create the Hollow Knight’s eye, draw two large ovals in the center of its head.
Step 5
Now we need to give the sword to our bugger. Draw a large oblong triangle near the end of his head with a small arm wrapped around the handle.
Step 6
Finally, draw the knight’s tattered cloak below his head, flowing behind him.
Step 7
All that’s left to do now is give our knight some color – white for the head, blue cape and black body – and he’s done! I hope you enjoyed learning how to draw Hollow Knight with me. If you did, be sure to check back for more tutorials! Happy drawing!


