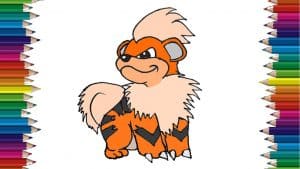
How to draw growlithe from Pokemon easy with this how-to video and step-by-step drawing instructions. How to draw pokemon characters step by step for kids.

Please see the drawing tutorial in the video below
You can refer to the simple step-by-step drawing guide below
STEP 1
First of all, start with the head shape at the top making half a circle to sell so you can continue to nose the same and circle down to smile. Next, add feathers at the top of it. This can be done by making zags small zags led down the ears. Also began to make a small triangle and shaded it into black leaving a tiny white dot for its pupils. Now you are ready to go down the rest of its body!
STEP 2
In this step, we are starting to pull out of the chest. This is like a feather on top, except it goes down ready to join back to the rest of the body. Just remember that this part is not perfect! Any style that suits you is good to use!
STEP 3
This step is really quite easy! Go from the right hand side and make a giant circle and go back. This will be the hind legs as if it were parked in a set position. Next, you will have to do the other two legs connected together to make this image of growlithe really practical!
STEP 4
Following from step 3, you will make the other two legs. Continue from the right flank to the bottom of it. When you have done the forefoot make sure you know that part of the leg is the start of the second leg so overall, looks like the front legs standing and the back legs in the sitting posture.
STEP 5
Well done! Almost finished! All you have to do is bushy tail by redoing the zig zags to form a circle! Once you have finished make sure that you add the details in such as the foot and claw lines. With your finishing design, you can add color and gloss to make it stand out and really look great!


