How to draw flounder from the little mermaid step by step with this how-to video and step-by-step drawing instructions. How to draw cartoons characters for beginners and everyone.
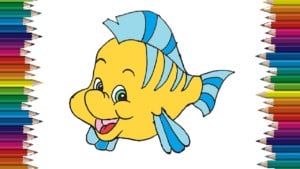
Please see the drawing tutorial in the video below
You can refer to the simple step-by-step drawing guide below
Step 1
To get the Flounder started, we would draw the outline of his body, which looks like a large circle with a smaller side. This smaller side will eventually be Flounder’s tail.
Step 2
Next, we need to paint Flounder’s cheek and lower jaw. His cheek will protrude a bit to give him a smiling smile.
Step 3
Next, we will move on to Flounder’s oval nose and inside his mouth.
Step 4
Draw the round eyes of Flounder sitting right on the nose and cheeks. His eyes are made up of three circles that will become his eyeball, iris and pupil. In addition, for Flounder two U-shaped brows “upside down” to complete his smile.
Step 5
Draw Flounder’s caudal fin, and give him two fins. As you can see from the picture, your forearm has three rounded heads with them.
Step 6
Next, draw a large Flounder dorsal fin across his body, almost like a Mohawk.
Step 7
At this point, all we need to do is draw four stripes running down Flounder’s body (each smaller than the last one) and divide the head of the dorsal into four.
Step 8
Finally, Flounder colors are yellow and blue with some stripes on his fins, and he’s done! I hope you like this tutorial!

Very nice, thank you!