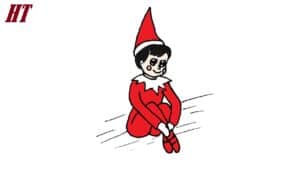
How to draw elf on the shelf with this how to video and step by step drawing instructions. Cartoon drawing tutorials for beginners and all.

Please see elf on the shelf drawing tutorial in the video below
Elf on the shelf Drawing Step by Step
Step 1
Make a circle for the head and then outline according to the guidelines on the face. Then you will also draw an oblong shape for the body contour.
Step 2
Define the Elf’s face shape, then draw a hairline that dramatically frames the face.
Step 3
Finish drawing the first part, then move on to step four.
Step 4
You can proceed to draw a simple eye shape, then draw a nose, mouth and eyebrows.
Step 5
Now we will draw the elf hat. As you do this, make sure there’s a puffy hoop at the base of the hat just like Santa wears.
Step 6
Next, we will draw some upper parts of the body. This shape looks like a diamond.
Step 7
From the collar, you will draw an arm and then some shapes of the torso. The right arm ends in a round hand.
Step 8
Draw the curving thighs, then move on to step nine.
Step 9
Okay, sketch the other arm and notice how the two round hands meet and touch each other. Add some creases under the pit, then give the arms some hem at the sleeves or cufflinks at the wrists.
Step 10
Complete The Elf on the Shelf by drawing the rest of the body. This includes the buttocks, legs, and feet. Erase mistakes.
Step 11
This is what Elf on the Shelf will look like when you finish drawing him. Add some color and you now have The Elf on paper.


