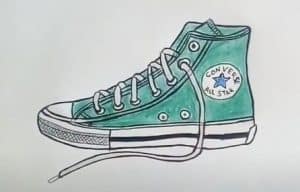
How To Draw Converse Shoes easy with this how-to video and step-by-step drawing instructions. Easy drawing tutorial for beginners and everyone.

Please see the drawing tutorial in the video below
You can refer to the simple step-by-step drawing guide below
Step 1
Here’s a quick sketch of Converse’s Chuck Taylor All-Stars breakout. Here I just point out some features related to Chucks. For example, there’s a double seam pattern that outlines the lace holes, the patch displays the converse star, and the high back and long toe construction.
Step 2
Let’s start. Draw a shape resembling a skateboard ramp as you see here.
Step 3
Now start sketching the actual outline of the Converse Chuck Taylor design concept as you see here, and when you’re done, make sure to give the shoe a rounded toe.
Step 4
Draw in the patch that the threaded holes are placed on. When finished, you can draw the eye holes, and then the laces. Be sure to take your time in this step so you get a nice drawing.
Step 5
Here you will draw the lining that separates the fabric from the rubber sole. After you pull out the rubber sole, you need to pull out the rubber slant part of the toe of the sneakers. Next, draw a circle for the sticker, and then draw a bold line in the center of the base. Erase the lines and shapes you drew in step one, then if you want you can draw the star symbol and write the words Converse All-Stars.
Step 6
This is what your sneakers will look like now that you Chuck is done. Now you can go ahead and color the shoe to your liking. I hope you had fun teaching yourself how to draw Chucks.


