How to Draw Chibi Thor easy with this how-to video and step-by-step drawing instructions. How to draw cartoons for beginners and kids.
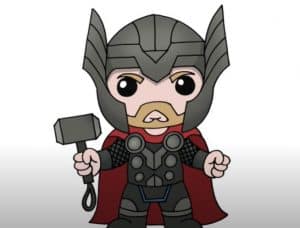
Please see the drawing tutorial in the video below
You can refer to the simple step-by-step drawing guide below
Step 1
First of all, let’s sketch our head of Thor chibi in the form of a circle. Next, outline the two intersecting lines as shown in our example.
Step 2
Now sketch the body and limbs of Thor chibi using very simple geometries. Use almost transparent lines to outline the thunder lord’s body.
Step 3
Use the light lines to outline the helmet, eyebrows, eyes and mouth on top. Next, outline the hammer in the hand, the cloak and the details of the outfit.
Step 4
Use clear and dark lines that depict the details of the face and remove all unnecessary lines. Outline the eyes leaving glare in it.
Step 5
Now find the contours of the famous helmet like in the Thor chibi drawing by the artists of Drawingforall.net.
Step 6
Now let’s move on to the body and draw all the details of the outfit like in our example. Repeat the armor on the chest and mark six circles on the front of the torso.
Step 7
Now draw the arms, hammers in the arms and legs. At the end of the step draw the contours of the mantle and remove all remaining guides from the Thor chibi drawing.
It is a lesson on how to draw chibi Thor. This lesson, like all our lessons, is broken down into a few very simple steps to make the drawing process simplest and easiest to understand. We would be very grateful if you subscribe to us on social media and share our drawing lessons with your friends. We continuously (almost every day) publish lightened versions of our drawing tutorials, and on our Facebook and Twitter pages we publish announcements about their upcoming drawing lessons. I.
