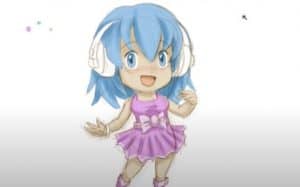
How To Draw Chibi Manga Girl easy with this how-to video and step-by-step drawing instructions. Manga Drawing tutorial for beginners and everyone.

Please see the drawing tutorial in the video below
You can refer to the simple step-by-step drawing guide below
Step 1
First, let me start with the difference between anime and manga. Here you can see my chibi anime and chibi manga tutorial side by side. Note that the anime tutorial is a -lot- less detailed? This is because when doing animation, detail is lost due to time management. If they made every scene in detail like a detailed scene in a manga, it would take too much time and too much money to finish the anime. No problem though! Our detail lovers still have manga!
Step 2
When drawing manga, there are several different types of chibis that you need to be familiar with. The first is the detailed chibi. Notice the well-defined curls, the ends pulled up, and even some ripples on her clothes. This chibi will be used in important plot points in your manga. (High emotional score, plot climax, close-ups, transformations, character development)
Step 3
Next will be the smaller chibi. This chibi has a slight amount of detail and still has the numerals and directions to her clothes. These chibis don’t take long and will probably be the most commonly used chibi in your entire manga. These chibis are your storytellers and will lead to your detailed chibi scenes.
Step 4
Then we have the stick figure chibi. This chibi takes little or no time to draw and is the “bridge” chibi to your manga plot. This chibi will tell tidbits about your story that are important enough to be there, but generally don’t make any sense. For example, if our heroine slipped on a bus, and then a bad guy showed up.. we would use our stick figure chibi to portray the scene where she lost her bus and then is a dramatic twist with detailed chibi to find the enemies that await her. Now that you know a bit about the different manga chibis, let’s try a scene!
Step 5
Let’s start with the basic circle! This will start building our head. Don’t worry if it’s not perfect. Mine is not!
Step 6
Thereby creating more pointed chin and upper half structure for the body. This is just the increased waistline, so don’t worry about the legs. Manga tend to not have full bodies in most of their molds because they don’t fit well!
Step 7
When detailing, start easy and work your way up. Let’s start with bangs in a fairly basic form without excess lines on them. Make sure your bangs are past your chin!
Step 8
Now let’s move on to her ponytail. Make a sharp half oval at the pull point for the top part of her hair, and on top create a half oval with another sharp oval half. Then draw the hair sticking out the back of her head.
Step 9
We need a face that matches that hair! Draw a pair of half-closed eyes, a gentle smirk and some eyebrows and eyeliner. You should line your eyes lighter or thinner than the rest of the face.
Step 10
Now to start drawing the rest of her body. Don’t worry about her hand painting at first, as most of it will be covered by her sleeve. Instead, just draw her sleeves. Draw her shoulders, other half of her arm, waist, and flares to locate her skirt.
Step 11
Now you can draw the fingers that we didn’t draw in the previous step. Paint her collar with flaps, corset top, armbands and waves on her skirt. With the dress, shoot in batches instead of trying to do the whole thing at once. This will break it down and make it easier for you to manage.
Step 12
Now draw the missing sleeve and the skirt sleeve that has been pulled inward. Again, most of the sleeves should be hidden in the sleeves!
Step 13
Now that the basics have been drawn, you can start getting into the technical details. Add some extra drag to her head and ponytail. Add some additional lines to her bangs for depth and note that each curl has at least one or two lines. Try not to draw lines completely in between the strands, as it can look odd. Draw them off-center or close to the side to look more natural and less robotic.
Step 14
Now to draw the design for her dress! Notice on the corset that all of my lines are drawn towards the southern point of her corset. This gives ventilation to the outfit and is a must if you’re going to draw anything on the corset. You don’t have to draw the triangle designs I drew, but just remember to drag to that point no matter what! Draw in the sleeve details and the triangles on the skirt.
Step 15
Finally, draw some lines on her collar and bodice to show movement and pull, draw her collarbones poking through, draw some pulling ripples for the corset and two small lines showing Skirts pull on the pull point of corsets too.
Step 16
Congratulations, you’re done! I colored this in black and white as most manga don’t have color.. however, you can color this however you see fit! Have fun!


