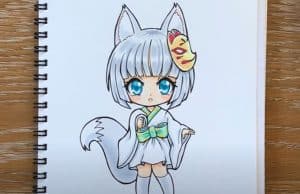
How to Draw an Anime Fox Girl easy with this how-to video and step-by-step drawing instructions. Anime drawing tutorial for beginners and everyone.
Please see the drawing tutorial in the video below
You can refer to the simple step-by-step drawing guide below
Step 1 – Draw Fox Girl’s Head
Start by creating a vertical line through the center of your drawing area. This line lets you know if both sides of the head/face are relatively equal in width.
Next as shown in the illustration I for example draw a circle representing the top of the head leaving enough space above to fit the ear.
Going down from the circle draw the bottom part of the head. It gets narrower as it goes down starting with a pair of straight angled lines that transition into a pair of curves around the cheeks. They will then change into a pair of straight lines that go towards the bottom center of the head and finally join the small curve of the chin.
Step 2 – Draw Neck & Shoulders
Going down from the bottom part of the head, draw the neck. Since this is a slightly stylized anime character, the neck is relatively thin relative to the head.
The neck then turns into the shoulder muscles and then the shoulders themselves.
Step 3 – Positioning the eyes
To place the eyes make the eyes vertical by drawing a line and placing them just a little below it.
At this stage, avoid drawing any interior details, those details will be added in later steps.
In this case, the character will have a very light smile so the eyes will be a bit narrower than their normal expression. You can also draw lower lashes/lashes slightly curled upwards to further emphasize this.
When spacing out the eyes, you want them to be spaced just enough that you can fit a third between them as shown above.
Step 4 – Draw eyebrows
In this case, the eyebrows will be quite thick, especially towards their inner tail. Draw them slightly above the eyes. The distance between them and the tip of the eyelashes (for this particular character) should be slightly less than the height of the eye.
Step 5 – Positioning the nose
Draw the half of the nose between the horizontal midpoint of the head and the bottom of the chin. Unlike the eye, you don’t have to draw another horizontal line to place it, but you can if you want.
In this case, the nose will just be a small vertical dot or dash.
Step 6 – Positioning the mouth
Place the mouth slightly above the halfway point between the nose and the bottom of the chin (as in the example).
In this case, the fox girl would show a slight smile. To make the mouth look a little more like an animal, draw a smile with subdivided curves in the center, for example.
Step 7 – Draw Fox Ears
Of course, the fox girl’s distinguishing feature is her ears. They can be drawn right into the hair but at least a good idea of how they will attach to the head. For this reason, we will add fox ears in front of the hair.
Start by sketching the shape of each ear, then add the parts where the ears curve to show their outside.
To give the impression of fur, you can draw several small sections at the top of each ear.
Step 8 – Draw the hair in front
To be painted, the hair will be divided into front, sides and back sections.
Draw clusters just above the contours of the ears and head. You can then erase the bottom parts of the ears (where they are hidden) but leave the outline of the head to help you place the rest of the hair.
Step 9 – Draw the hair on the sides
Next, add the side sections (shown in green). In this case, it would be just two large tufts of hair, again shaped a lot like a fox’s tail.
Draw these clumps with a bit of a curve so they appear to “hug” to the face a bit.
Step 10 – Draw the hair in the back
Finally add the hair in the background (in blue). You can draw this part with some smaller blocks towards the bottom that stick out a bit towards the sides.
Once you’ve finished drawing the hair, you can go ahead and erase the parts of the head/face that are covered by it.
Step 11 – Draw feathers/earrings
As usual for animal ears, you may see some hair/silk stuck on them. Draw it similarly with the hair in a few large clumps as shown in the example.
Step 12 – Draw the clothes
While for this drawing you can only see part of the body, you can still show some clothes.
In this case, the fox girl will wear a traditional Japanese dress. A shrine maiden or “miko” outfit.
You can draw the characteristic collar of the dress as shown in the example.
Step 13 – Draw the details of the eye
Now that all the main parts of the character are outlined, you can add some smaller details like the eyes.
Inside each eye, draw the pupil with a pair of highlights. You can also show off a bit of eyelids by drawing a small curved line just above (near the inner corner) of each eye. Next paint the lashes with black or pencil and add some hints about each lash.
Although the eyes are not exactly the same, the steps to draw them are very similar.
Once this step is done, you can trace your lines with a darker pencil stroke. If you feel confident in your tracing abilities, you can also use a black pen or marker.
Step 14 – Apply Color
In this case to make the character more fox like she would have blonde/orange hair and ears. Leave the fluff of the ears white and keep some areas white to create accents inside the hair.
Please note that if painting digitally, it can be easier to add all the white areas on top of the color instead of painting around them.
You can also leave a pair of white tails in the side clumps to make them look like a fox’s tail (yellow/orange with white tips).
Next, blend the color of the face / neck and optionally give the fox girl a little blush. Draw the blush as two red lines just below each eye just above the face color.
Finally, you can make the eyes green and the inside of the neckline red (very typical of “miko” skirts).
If you want the eyes of a fox to be more realistic, you can make them orange or brown instead of green.
Step 15 – Add Shadows & Finish the Fox Girl Drawing
To complete the drawing, you can add a little shadow and a little gradient around the blush lines.
For the blush, just blend a little red around the lines drawn in the previous step.
Shadows in this case (as in most similar tutorials here on AnimeOutline) will be added to areas where shadows are more likely to appear in normal lighting conditions such as well-lit rooms or daylight out side.

