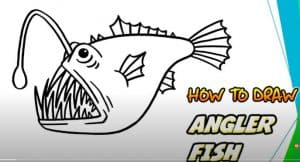
How to draw an anglerfish easy with this how-to video and step-by-step drawing instructions. How to draw a fish for beginners and everyone.

Please see the drawing tutorial in the video below
You can refer to the simple step-by-step drawing guide below
Step 1
Start by drawing a horizontal curve. This outlines the back of the anglerfish.
Step 2
Below the first line, draw two overlapping curves. This forms the fish belly and lower jaw.
Step 3
Connect the lines on one end with a short curve. Then use a large, loose, rough shape line to surround the caudal fin.
Step 4
Use two curves to outline the extended fishing mouth. Allow the botlane to duplicate itself before it meets the lower jaw, adding more details to the mouth.
Step 5
Drawing anglerfish Long fish, sharp teeth. For each tooth, use two curves that meet at a sharp point. Note that teeth grow longer when they reach the edge of the mouth.
Step 6
Detail curvature of mouth and jaw with curves of different sizes. Then draw the appendages of the back, or draw. Extend two parallel curves from right inside the fish head, removing paths as needed. Connect the lines using a short curve at the base and a small oval to form the end of the bait. Detail the attraction by drawing a smaller, incomplete oval inside it.
Step 7
Draw the pectoral fins. Start with a vertical curve. Then use a longer line to surround the shape of the fin. The upper detail of the mouth with a short curve. Draw a circle to indicate the eye, with a smaller circle inside it. The ball is between two circles, and surrounds the eye with two curves, like parentheses.
Step 8
Draw the dorsal fin. First, accompanied by an irregular shape, followed by a larger irregular shape. Detail second shape with some short curves. Finally you can color the fish.


