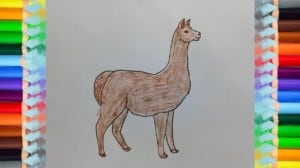
How to Draw an Alpaca step by step easy with this how-to video and step-by-step drawing instructions. Easy animals to draw for beginners and eveyone.

Please see the drawing tutorial in the video below
You can refer to the simple step-by-step drawing guide below
Step 1
Start with the head by creating a high arc. Add collision to ear and face as shown above.
Step 2
Draw eyes with small ovals, and use the small lines for the mouth and nose. Use two arches very close together to make the ear.
Step 3
Draw the next body, continue from the beginning and use the curves to identify the neck and the higher part of the back.
Step 4
Draw the front leg using two vertical lines spread out to meet in the legs, made using a small indentation on the right line.
Step 5
Draw the tail by creating a curve that starts from the left and the curve as it moves down.
Step 6
Draw the hind legs behind the body by making it look like the front leg except the broader and with a corner in it. Draw up on the left until you reach the tail.
Step 7
Draw the hind leg by only making some of the legs like the first hind legs, near the bottom. The rest is hidden by the first hind leg.
Step 8
Draw the front leg with a downward line that comes back just a little after you paint the leg. Your Alpaca is complete! You can color the Alpaca to look more realistic.


