How To Draw Alien Vs Predator easy with this how-to video and step-by-step drawing instructions. Easy drawing tutorial for beginners and everyone.
Please see the drawing tutorial in the video below
You can refer to the simple step-by-step drawing guide below
Step 1
Let’s start by drawing the Predator. We will start with these instructions. This is the shape of the head without all those tentacles.
Step 2
Lighten your guide lines. Then we’ll start drawing the Predator’s helmet. I like to start with an L-shape for the brows. From there, the entire lower face area is a large box. The front slopes inward, like an empty bowl.
Step 3
Draw a square for the eyes. It is like a sunglasses. Then draw the contours of the forehead.
Step 4
Draw the cheekbones and the slope of the cheek area. Then draw the back of the upper helmet.
Step 5
Fill in the back line of the jaw. Then add some dashes to shape the front of that jawbone. Above the eye we can use a thinner line to add some detail and outline the laser position. It is a small round shape. It pointed straight at whatever he was looking at.
Step 6
Here we will fill in the eye lens and add gradient to the front of the mouth area. We can also add some more details around the laser site area.
Step 7
Now we will start the flesh of his head. This jutting ledge behind this helmet is where all the fear springs from. Use inward curves to create the basis for each tendon.
Step 8
Use long, curved lines to draw in the main dreadlocks.
Step 9
Using the same type of shape, fill in the hair around the previous spills. Vary the length, thickness, and curves of your hair to make everything seem more natural. The teeth near the jaw are thin and curved back, below the rest of the hair.
Step 10
Draw small curves through the scarecrow to create “beads” as proof of successful hunts. The Predator’s armor plates are somewhat of a trio design, so use that type of crustacean for the shoulder pads.
Step 11
Now we can outline the rest of the torso and neck.
Step 12
This is where we can add some more details. On the chest and back, use repeating curves to continue that trilobite look for the armor.
Step 13
Now we will start drawing the head of the Xenomorph Alien. Get started with these instructions. There’s a lot going on here, so take your time to get the ratio right.
Step 14
Lighten your guide lines. Then start drawing by sketching the front shell that rests on the upper “face”. There are many wrinkles on the upper lip.
Step 15
Draw the diagonals of the jaw muscles and detail them with some curves. Next draw in the upper teeth and gums. On the forehead area, we will draw irregular curves to indicate inward sloped areas. Note the thickness of the lines. Thicker parts of the line indicate shadows. Taken together, these curves give the shell a bony appearance.
Step 16
Outline the lower jaw and draw the remaining teeth. The hard part is drawing between the muscle fibers of the jaw.
Step 17
For this step, start by drawing a center line running along one side of the head. Then draw the circle of the shoulder “girdle.” Then we can draw the lumpy organ on the side of the head, and the great neck muscle below. Use small, alternating curves to create the contour texture here.
Step 18
Draw lines across each of those neck muscles to create a sort of electrical cable. Follow that by drawing the front and back neck muscles. Note the thick to thin lines being used here. We want to add some shadows where we can, to show that these shapes are on a different layer than the underlying surface.
Step 19
Here we’re going to start really detailing the areas between the neck muscles. We will again use thick to thin lines to add a bit more shadow and flesh to the neck. Now we can also draw at the top of the actual shoulder.
Step 20
Draw small, blob-like shadows to add pits or holes along the curve of the inner neck areas. The slightly longer rectangular shadows on the neck muscles give us a little more reflection and a bit more dimension to that shape. The agency above gets a lot of attention here. Each of these shapes is essentially a loose rectangle. I changed the line weight and subdivided the lines to give everything an organic feel. The lines are thicker towards the top. You have to picture these things in your head because you can slide your finger down. If you can imagine touching something, sometimes it’s easier to visualize and draw.
Step 21
For the top of the head, we mainly repeat the shape on the back of the face shell. As we go to the back of the head, the shapes get stretched. They also become smoother, to give us a round bulb in the end. The bottom armor plates of the head are elongated.
Step 22
Now we can draw the “girdle” on the opposite shoulder. I’m not even sure what to call it. A bone? A tube? I do not know. The back of the neck has the power cable looking into it – rectangular segments with smaller lines in the middle. On top of that, we can add ball shapes resembling an open heart valve. Thick to thin, with the thickest at the bottom. Use small creases to fill in the areas between the armor on the side and back of the head.
Step 23
Here we will shape the main ridges and pits of the armored panels. Thick-to-thin again. The thickest parts of the lines show the greatest difference between the two surfaces. Think of round shapes as eye sockets, with bony ridges running around your eyes.
Step 24
Add some smaller details on top. There is a lot of texture to add to the jaw area. From thick to thin. Deep wrinkles from the base of the jawline, becoming shallower towards the chin. We can accomplish this by drawing the secondary mouth, with a heavy shadow in the upper part.
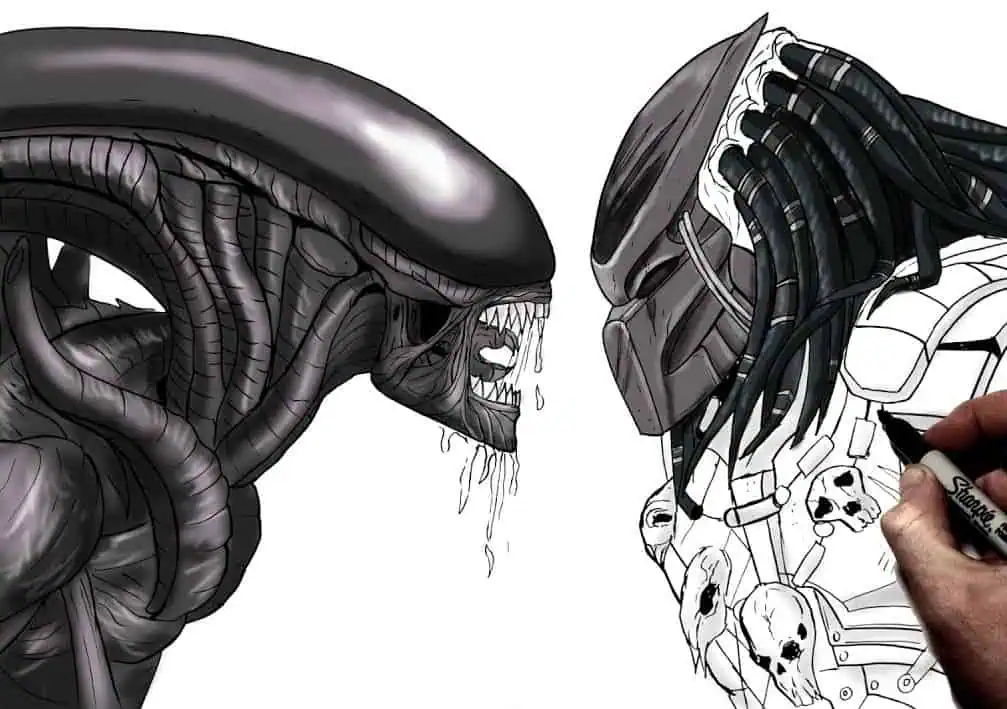
Step 25
And here is your final line art. I had to crop things a bit to get them to fit. This is a pretty intense couple. I hope you guys enjoy drawing with me. I want to tackle some different Predator and Alien designs in the future, so keep that in mind. Thanks for watching!


