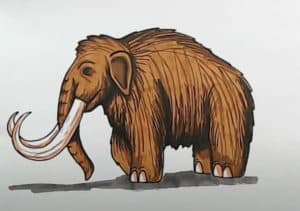
How To Draw A Woolly Mammoth easy with this how-to video and step-by-step drawing instructions. Easy animals to draw for beginners and everyone.

Please see the drawing tutorial in the video below
You can refer to the simple step-by-step drawing guide below
Step 1
To get a good understanding of our mammoth, we’ll first need to draw some sort of pea shape as the basis of its body.
Step 2
Next, draw a large half circle attached to a bean shape to form the base for the mammoth’s head.
Step 3
Draw two large “S” shaped curves on each side of the mammoth’s head to form the sides of the skull.
Step 4
Now we can erase our overlapping lines and draw two small triangular mammoth ears. One key difference between woolly mammoths and elephants is that the woolly mammoth’s ears are significantly smaller than the elephant’s ears.
Step 5
Next, close the face by drawing the long, curved body of the mammoth extending down just below the lower body.
Step 6
On each side of the trunk, we will now need to draw the mammoth’s large upward curved tusks.
Step 7
Near the back of the body, draw the mammoth’s small hind legs with a few curved claws at the bottom.
Step 8
Next, draw the mammoth’s front legs similar to the hind legs. Unlike elephants, mammoths’ front legs should be slightly longer than their hind legs.
Step 9
Draw a large tuft of hair on the top of the mammoth’s head and a small almond-shaped eye on the side of the mammoth’s head.
Step 10
After the mammoth outline, draw a few lines to suggest the wool coat for which the mammoth is famous.
Step 11
All that’s left to do now is color our mammoth. Their bodies are said to be dark brown, except for their tusks which are light beige. And that’s it! I hope you enjoyed learning how to draw a woolly mammoth with me. If you did, be sure to stop by and check out all the rest of our tutorials. Happy drawing!


