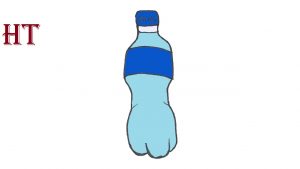
How to Draw A Water Bottle easy with this how-to video and step-by-step drawing instructions. Simple drawing for kids and beginners.

Please see the drawing tutorial in the video below
You can refer to the simple step-by-step drawing guide below
Step 1
In the first step of the tutorial on how to draw a water bottle, we will draw the outline of the bottle itself. We won’t make any details yet, but rest assured we will be adding them in the following steps! For now, we will use some curves for the bottle.
The cap of the bottle will be a rounded rectangle with a rim at the bottom, then the bottle will extend down from there, and the first of those curves will be drawn for the first bulge of the bottle.
Then it will curve inward and outward again into more curves. In the end, there will be some circles at the bottom of the water bottle, as shown in the reference image.
Step 2 – Draw some details for the water bottle
You have completed your water bottle sketch, so now we can start drawing the first details in this second step.
For now, the details will be very subtle, but later on they will be more complicated. Now draw some short curved lines horizontally onto the bottle, then use some lines in the bottom half.
The details we add will form the label of the bottle as well as add some shape definition to the bottle. Then we’re ready to move on!
Step 3 – Continue adding some subtle details
Continue with this tutorial on how to draw a water bottle, we will add more details to your drawing. First, you can draw some short, vertical lines onto the bottle cap.
They will form ridges that create friction with your finger so you can rotate it.
You will then draw another horizontal line on the body of the bottle to create the upper part of the label. You’ll be able to decorate that label later if you want, but for now we’ll move on to the next step.
Step 4 – Continue adding some details
You are doing a great job with this water bottle drawing! We will continue to add some more details in this fourth step.
As you can see in the reference image, we will add some slightly curved vertical lines to the bottle to give it a more defined shape. Details like these are subtle but make a big difference!
In the next step, we’ll add some final touches to finish it off before you start coloring.
Step 5 – Add the final details of this water bottle drawing
The final step in which you will color your painting is coming, but first we will add some final little details in this step of the how to draw a water bottle tutorial. First, you can add some curves near the top of the inside of the bottle to show where the liquid is filled.
That will do it for the final details, but that doesn’t mean you have to move on! In this step you can also add some details of your own to complete this picture.
We mentioned earlier that you can draw some details on the label and that would be a great way to personalize your photo. Perhaps you could create your own label design!
Then you can try some ideas like drawing background and other objects. Maybe you could show us other drinks or foods that you would enjoy with whatever this water bottle contains. Be sure to get creative and have fun with it!
Step 6 – Complete your water bottle drawing with some colors
This is the final step of your water bottle painting process and this is where you can go coloring your artwork!
In our reference image, we used different shades of blue and light gray to colorize the image, but that’s just a suggestion.
You can use any color you love for this coloring, as the bottles will usually have bright and vibrant colors to decorate them.
Alternatively, you can indicate that this bottle contains something other than water. Perhaps you could use some shade of brown to show that there is some delicious cola in this bottle.
You can also entertain yourself with the artistic medium you choose for this image. Watercolor paints and crayons are great options for a more subtle look.
On the other hand, acrylics and crayons are perfect for creating lighter shades. What colors and art mediums do you think you will use for your images?
Your water bottle drawing is done!
That’s it, you have completed the tutorial on how to draw this water bottle! Objects like these can be confusingly difficult to draw, so we hope this tutorial has shown you that drawing it can be fun and easy when you break it down into smaller steps.
Now that you’ve mastered this tutorial, be sure to show us what you can do with your own colors and details! There are many ways you can get creative with it, so we can’t wait to see what you can do.
The fun of drawing continues on our site! We have some great tutorials out there and the collection is always growing. Be sure to log in often to be sure you’ll find your new drawing challenge soon!


