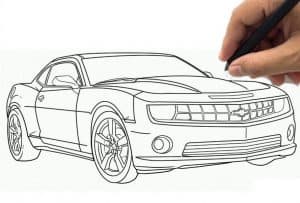
How to draw a Camaro easy with this how-to video and step-by-step drawing instructions. Easy drawing tutorial for beginners and everyone.

Please see the drawing tutorial in the video below
You can refer to the simple step-by-step drawing guide below
Step 1
We’ve drawn a large number of cars, and the lessons all start the same way – the first thing we need is to sketch the general outlines of the car.
Step 2
At the front of the car Chevrolet Camaro depicts the headlights, a long and narrow grille located between the headlights and a large grille in the lower part of the bumper.
Step 3
On top of car sketch out windows and mirrors. Sketch the door and handle on the side of the car. Sketch the wheel arches and wheels yourself with the help of regular ovals.
Step 4
Start adding details. Draw angled headlights with circular lights inside them. In the same step, draw the grille between the headlights.
Step 5
Continue drawing tutorial on how to draw a Chevrolet Camaro. Draw the lower grille as shown in our example. The two sides of the grille pull the fog lights.
Step 6
Move to the front of the car and draw exactly the same roof as the roof of the Ford Mustang. Next, draw the outline of the window and mirror.
Step 7
Draw doors and handles (as you know Chevrolet Camaro has two doors). Draw the back of the car and the threshold line between the wheels.
Step 8
At this point we have finished drawing the body of the Chevrolet Camaro. Draw the wheel arches with the help of a semicircle and correctly draw the wheels in the form of an oval. Draw the wheel rim and move on to the last step of this lesson.
Step 9
We can just add shadows using the classic hatch, as we always do in all our car drawing lessons.
So another of our drawing lessons is over. We always do our best to make our drawing tutorials as simple and straightforward as possible, and you can help us with our work – just share this drawing lesson and write your wish. in the comments section.


