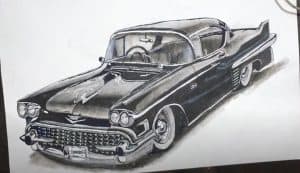
How To Draw A Vintage Car by Pencil with this how-to video and step-by-step drawing instructions. Car Drawing tutorial for beginners and ALL.

Please see the drawing tutorial in the video below
You can refer to the simple step-by-step drawing guide below
Step 1
Start by drawing such a frame or body guide.
Step 2
Using the manual, start drawing the bubble shape of the classic car body structure. Start with the round hood, then the straight hood, fenders and wheel hubs.
Step 3
Draw domed shapes for the headlights, then draw stylish bumpers and grills.
Step 4
Now we will draw the outline of the front windshield, and then draw the lines that appear to the passenger door and window.
Step 5
Define the headlights by creating the shapes and lens slots that the lens hits. Add detail to the front grid by drawing a series of small squares. Add definition also for buffer.
Step 6
Next, draw the tire, ring cap, and rim.
Step 7
Finally, smoke the fog at the foot of the vehicle. These lines take the form of ripples and ripples. Erase your mistakes and guide.
Step 8
Your freshly drawn drawing can be colored now. You can go with the classic colors, or customize the car by adding decals or whatever you like.


