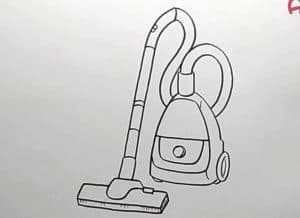
How To Draw a Vacuum Cleaner easy with this how-to video and step-by-step drawing instructions. How to draw step by step for beginners and kids.

Please see the drawing tutorial in the video below
You can refer to the simple step-by-step drawing guide below
Step 1
First we draw the body of the vacuum cleaner in an oval shape with a flat bottom.
Step 2
Now to sketch the coil of our vacuum cleaner.
Step 3
Now draw pipes and nozzles. Here we have to use straight lines in general.
Step 4
Add some details to the vacuum cleaner, such as the lid and wheels.
Step 5
Draw the body of the vacuum cleaner. Add some new details, such as handles and switches.
Step 6
Now unplug the hose, hose and hose of the vacuum cleaner. More details like in our example.
Step 7
Add some shadows using a simple hatch.
We hope that with this drawing lesson you learned how to draw a vacuum cleaner. We remind you that on our social network you will always find the latest drawing lessons, so don’t forget to subscribe and share this drawing lesson.


