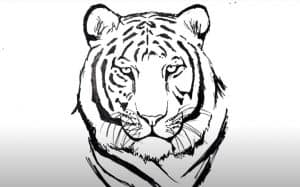
How to Draw a Tiger Face Easy with this how-to video and step-by-step drawing instructions. Easy animals to draw for beginners and everyone.

Please see the drawing tutorial in the video below
You can refer to the simple step-by-step drawing guide below
Step 1
Take the pencil and outline the circle as a guide for the tiger’s head. Next, draw the vertical lines of the forehead symmetry and the horizontal line for the eyes.
Step 2
In the upper part of the circle, draw the tiger’s ear and on the lower part draw the muzzle with the help of a circle. Next outline the contours of the neck.
Step 3
Let’s add a few more basic details. Draw lines in the ears. With the help of horizontal lines from the previous step, outline the eyes, from the eyes draw lines and form the cat’s nose and mouth.
Step 4
Continue the lesson on how to draw a tiger’s head. Let’s make the drawing more detailed. Draw our tiger’s shaggy cheekbones and cheeks.
Step 5
Here we delete all unnecessary extra lines and make the lines of our drawing clearer. The tiger’s head drawing is almost ready, still just adding strips and shadows.
Step 6
Now let’s work with our tiger’s bands. Start with stripes on the muzzle. Next, draw stripes around our big cat’s face.
Step 7
There’s still the final step in which we add a shadow and draw long, slightly curved hairs.
It seemed to us a very enjoyable drawing lesson and the tiger’s head drawing came out really well. Did you like this drawing lesson? If so, let us know in the comments below this article and write other articles you would like to see on the pages of our website.


