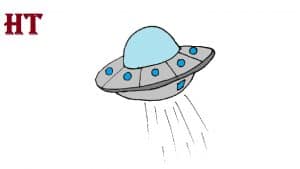
How to Draw a Spaceship Easy with this how-to video and step-by-step drawing instructions. Easy drawing tutorial for beginners and kids.

Please see the drawing tutorial in the video below
You can refer to the simple step-by-step drawing guide below
Step 1
Start by sketching the flying saucer. Draw two long curves. Connect them at the ends using oblique lines.
Step 2
Draw a long curve to connect the vertices of the short lines. This outlines the edges of the ship and gives it a three dimensional look.
Step 3
Draw an oval right on the previous line. Stick the half oval shapes onto the side of the ship. These are classic UFO lights.
Step 4
Draw a curve below the ship, outlining a semicircle.
Step 5
Stretch a curve from the semicircle and duplicate it back to itself to surround a part of the oval. This is the “leg” or landing pad of the ship.
Step 6
Draw a second landing pad, erase as needed. Notice that the oval is slightly flattened above.
Step 7
Extend a curve from the bottom of the ship and fold it back over itself to form the final landing pad.
Step 8
Draw a long curve above the ship, enclosing a part of the circle. This is a windshield or window.
Step 9
Draw a long curve across the top of the train, connecting the ends of the circle partially. This outlines the opening where the pilot sits. Draw another curve to indicate the other side of the opening.
Step 10
Color your cartoon flying saucer.


