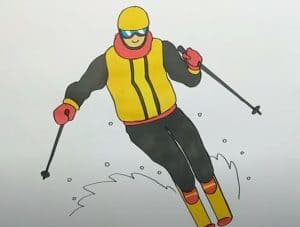
How to Draw a Skier easy with this how-to video and step-by-step drawing instructions. Drawing jobs tutorial for beginners and kids.

Please see the drawing tutorial in the video below
You can refer to the simple step-by-step drawing guide below
Step 1
Our skier will be in a very characteristic position – he is skiing downhill. Head slightly lowered, back and knees slightly bent. First of all, sketch the head in the form of an oval. Next, use a slightly curved line to draw the spine marker (the neck is not visible from the back of the head). Draw the chest and pelvis. At the end of the step, outline the bent arms and legs.
Step 2
Draw symmetrical lines of the face that intersect at the bridge of the nose. Since our skier is looking down, the lines will intersect slightly lower than if the skier was looking straight ahead. Next, outline the slightly curved torso and triangular pelvis. Add volume to the arms and legs with simple geometric shapes. On our hands we are drawing ski poles and at our feet we are drawing skis.
Step 3
Now we start working with the details. First of all, using light lines, outline a hat, glasses, nose and mouth. Connect the geometric shapes from the previous step with the help of smooth lines to make the skier’s body shape more realistic.
Step 4
Let’s start working on the final details. On the top of the head draw a hat and glasses. A little lower draw the nose and mouth. Carefully draw the contours of the face, jawline and cheekbones.
Step 5
Continue the lesson on how to draw a skier. Here we will draw the upper body. Remove all the guides and draw the exact shape of the torso and arms. Add some folds in the bent areas. Also don’t forget to outline the skier’s uniform.
Step 6
Let’s go down a bit and work on our skier’s lower body. With the help of smooth and slightly curved lines draw the outline of the skier’s leg. The legs are quite massive and muscular, so don’t forget to draw visible muscle lines under the clothes. Draw the skateboard (which looks pretty short from this point of view) and erase all remaining principles.
Step 7
Skier’s drawing is ready. Now we need to make it more massive and realistic. For this we will draw shadows using hatch. First, imagine that the light is falling from the top right corner of the paper, which means we draw the bloom line in the areas where the light doesn’t get in.
We hope that your skier looks as good as ours. If you don’t like the result of your work, then just repeat the step where you made a mistake, because only practice can make you a great artist.


