How to Draw A Skeleton Head easy with this how-to video and step-by-step drawing instructions. Drawing tutorials for beginners nad everyone.
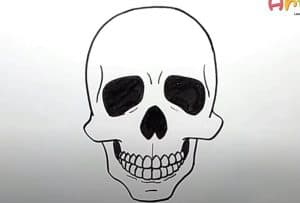
Please see the drawing tutorial in the video below
You can refer to the simple step-by-step drawing guide below
Step 1
We will start with the outline of the picture in the first step of the tutorial on how to draw the skull.
The skeleton head outline has some shapes, lines, and structure specific to it, so we’ll cover each element slowly and individually.
The top of the skeleton will be quite rounded and it will directly create some contours for the cheekbones.
The jawline will also be drawn with some straight lines to create a sense of squareness and angularity.
Finally, you can extend some lines inside the head of the skeleton down from the cheekbones, as this will start the outline of the teeth which we will draw later.
Step 2 – Next, start drawing the details on the face
We’ve completed the general outline, so now we can start adding some facial features to your bonehead drawing.
First, we will draw the eye sockets. These will be some flat ovals, usually ovals, but we’ll use some pretty angled lines to draw them.
There will also be some curves extending up from their outer corners. Then we’ll draw the nasal cavity, and it has a rather odd shape.
It will have two pointed points at the top and two slightly rounded points at the base. Finally, you can end this step by starting the bumpy lines that will be where the rows of teeth will connect.
Step 3 – Now draw some teeth and facial details
For this step of the skeleton head tutorial, we will focus on the top of the teeth and the facial details.
For the teeth, you can start drawing a row of round tooth shapes that connect to the center line you started with earlier. For now, we will work on the right side, but we will finish it later.
Then we’ll add some simple detailing around the eyes and cheeks of the skeleton head to give it some definition. Then you’re ready to move on to step 4!
Step 4 – Next, finish the teeth and add some details on the face
This step of the tutorial will see you add the rest of the teeth along with some other facial details.
For the teeth, you’ll simply extend what you started with in the previous step by adding some individual tooth shapes to the center row you started with earlier.
We will then add some contour detail all over the skeleton head, and these areas will include the jaw, cheeks, and around the eyes to name a few.
Then all that’s left is to add some final details in the next step and you’re ready to color!
Step 5 – Now, complete your bone head drawing
We’ll be focusing on some final details for this part of the how to draw bone heads tutorial. Mostly, we will focus on some of the shading details for the skeleton head.
To do this, we will add some fine line detail to most of the contours of the skeleton head and the reference image will show you where they should be placed.
These lines will help create more depth for the head of the skeleton. Then you are ready to continue! Before you do it, you should make sure to add any details and additions you might want to it.
You can paint some more skeletons, create a background, or maybe turn it into a spooky Halloween poster!
There’s a lot of creativity you can do on this drawing, so make sure to get creative with it and see what you can come up with.
Step 6 – Finish up your skeleton head drawing with some colors
Now comes the final step of your skeleton head drawing, and in this step you’ll bring some amazing colors into your drawing.
In our reference image, we used a light beige color for the skeleton head while using some brown for the eye and nasal cavities.
However, these are just some examples of what you can do, and you should feel free to use any color you like for it.
You can keep the colors more realistic like our example, but you can also be more stylish with it by using some lighter colors.
You can then have some fun deciding on the artistic medium you’ll use to apply the colors, and we can’t wait to see what colors and art tools you choose!
