How To Draw Grim Reaper easy with this how-to video and step-by-step drawing instructions. Simple Drawing tutorials for beginners and everyone.
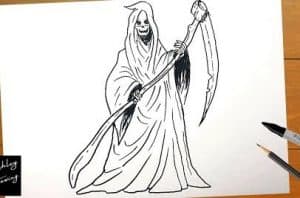
Please see the drawing tutorial in the video below
You can refer to the simple step-by-step drawing guide below
Step 1
There’s a lot of detail in this tutorial on how to draw Grim Reaper, but this first step should get you started with ease.
We already mentioned that one of the standout features of this character is his big black hood, and that’s what we’re going to start with in this first installment.
To start, draw the opening of the hood using a long, thin diamond shape. After you have drawn this, then add some curved lines to one side of it and then draw the top drooping a bit.
That’s all there is to this step, so let’s move on!
Step 2 – Now draw the shoulders of his cape
With his hood drawn, we will now focus on the shoulders of his cape for this part of your drawing of Death.
To do this, simply draw some curves down from the edges of the hood, then use some more curves on the inside edges.
When drawing any aspect of the cape, we will make heavy use of these curves, as the aim is to make it look very creased.
Step 3 – Next draw the details of his skull and hood inside
Death is famously a skeleton in a cloak, so we will draw his skull in this step of the how to draw Grim Reaper tutorial.
First, start with some black circles for his eye sockets. Then use a two-pronged shape for his nasal cavity, and then we can start on his mouth.
The mouth will be drawn with another black shape, and this will be flat and slightly rectangular with some tooth shapes at the top and bottom.
Then finish by drawing more folds of the hood underneath the head before you continue.
Step 4 – Draw his arm and start his scythe
Continuing with your drawing of the Grim Reaper, we’ll focus on the arms in his cloak and start with his famous scythe. First, let’s draw those sleeves.
As mentioned earlier, there will be loads of frills on his cape, and his sleeves will be quite long and flowing.
The right arm will also be a bit taller as both hands will be grabbing his scythe. Speaking of which, we’ll also draw the treatment of that now.
The scythe was long with some curves and looked like it was made of a piece of wavy wood. It will be captured in his bony hand which we will draw now.
Then let’s move on to some more details in step 5.
Step 5 – Now draw some more of his sleeves and scythe
In this step of the Deathly Hallows tutorial, we’ll be finishing off the bottom of his sleeve along with his scythe.
We mentioned earlier that his sleeves are long and floral, and we’ll show that in this step.
Using some curves ending in sharp points at the end, you can complete the drooping opening of the sleeves.
Then we’ll add his big scythe. We’ll be using some more curves for this and the blade will stretch down quite a bit with lots of smaller details to make it look weathered.
Step 6 – Add the rest of the body in this step
Before you color the Grim Reaper drawing, we just need to paint one more part. All you need to do is draw the rest of his cape, and I’ll start that off by drawing some curves going down from his sleeve.
We’ll then draw the base by showing the material falling on the ground, and then finish by adding loads of crease details to the section.
When it looks like in our reference image, you’re ready for the final step! Be sure to add any additional details of your own that you may want.
You can draw a background, such as a spooky graveyard backdrop for an idea, but what else can you think of to complete this drawing?
Step 7 – Finish your Grim Reaper drawing with some color
This step in our tutorial on how to draw the Grim Reaper will finish it off with color.
We kept the color pretty muted in our reference image, as we kept it black for his cape with brown and silver for his scythe. Will you go with these colors or use some of your own color choices?
You can also experiment with some great art media and tools, so we can’t wait to see what you bring!
