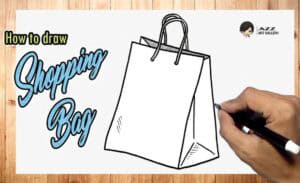
How to Draw a Shopping Bag with this how-to video and step-by-step drawing instructions. Start the lesson and get useful skills!

Please see Shopping Bag drawing tutorial in the video below
In this tutorial you will learn how to draw a shopping bag. Shopping bags usually come in a standard rectangular shape. The material from which such bags are made is plastic or paper. The top has two handy handles. Such a package can contain a lot of purchases, it can be food, clothes and any other goods.
This lesson consists of nine simple steps. By following my step-by-step instructions, you can easily cope with this task. Each step contains a simple action that any child or aspiring artist can repeat.
In this lesson, you’ll need the ability to draw smooth lines. Try to do it yourself, without using improvised elements. Hone your skills and in the future it will be easier for you to draw complex objects.
Shopping Bag Drawing Step by Step
Step 1. Draw the top edge.
Draw a horizontal line.
Step 2. Sketch the side.
Add a vertical line to the horizontal line.
Step 3. Draw the bottom.
At this stage, depict a horizontal line at the bottom.
Step 4. Add the second side.
Draw a vertical line to the right.
Step 5. Sketch the side.
On the right, add a straight line to show the size.
Step 6. Sketch the curve.
At the bottom, draw two short lines at an angle to each other.
Step 7. Draw a handle.
At the top of the shopping bag, draw two dots and draw a semicircle.
Step 8. Add a second handle.
Draw a semicircle to represent the handle of the shopping bag.
Step 9. Color the drawing.
Choose any color you want.


