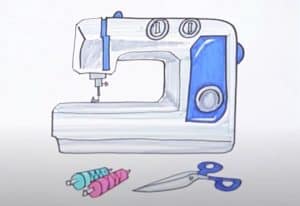
How to Draw a Sewing Machine Easy with this how-to video and step-by-step drawing instructions. Easy drawing tutorial for beginners and kids.

As it has been written many times on the pages of HTDraw.com, we would really like to describe how to draw many different objects, because a real artist must be able to actually draw everything. In the various categories on our website, there are lessons from cats to rockets. And today some of our drawing tutorials will be complemented by sewing machine drawing lessons.
Please see the drawing tutorial in the video below
Sewing Machine Drawing step by step
Step 1
First of all, create the contours of the sewing machine using very light and coarse lines. Repeat these outlines as done by the artists of HTDraw.com. Lines should be given the most light to make them easier to fix or erase.
Step 2
Now let’s add some important details continuing to use pale and coarse lines. Description of the needle, all necessary switches and feet under the sewing machine. In this step your sketch of a loose typewriter will look like this.
Step 3
This step will be very wide, as we will be working on the entire surface of the sewing machine drawing. Darken all the lines of the drawing and make them clear and smooth to give your sketch a complete look.
Step 4
Shadows and highlights will make your sewing machine sketch more complete and beautiful. Add them to places designated by the artists of htdraw.com. In addition to these actions, you can still paint more details or colors to make your painting more vivid and realistic.
As mentioned in the introduction to this article, we have tutorials on a variety of topics. Be sure to give yourself a tour of all the categories of htdraw.com, go through the pages and find interesting lessons for you, we are absolutely sure that you will find that. And don’t forget to share with your friends information about our site, this will help us to be known by many people and introduce to more people to art.


