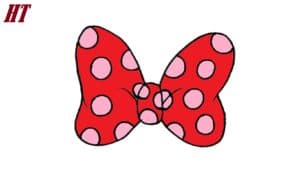
How to Draw a Minnie Mouse Bow with this how-to video and step-by-step drawing instructions. This step-by-step guide is very simple and you will definitely like it.

Please see Minnie Mouse Bow drawing tutorial in the video below
So I bring you a fascinating drawing lesson in which I will show you how to draw Minnie Mouse’s bow step by step. Minnie Mouse wears a pink dress, light shoes, and a bright pink bow with white polka dots. This bow is an immutable attribute and gives Minnie Mouse a special charm.
The bow consists of three elements—the sides and a small knot in the middle. With the help of my simple tutorials, you’ll be drawing these elements in no time.
You can use the skills acquired in the future when you want to draw a similar bow. For example, you can draw such a bow on the head of a little girl or decorate the princess’s clothes with a bow.
Minnie Mouse Bow Drawing Step by Step
Step 1. Draw the knot.
Determine the size and position of your artboard and draw an even oval.
Step 2. Draw the top border of the bow.
From the oval, draw two smooth curves.
Step 3. Add the rest of the bow.
Continue the lines and describe the lower parts of the bow to end with a closed border.
Step 4. Sketch the folds.
Draw short thin lines on both sides of the oval.
Step 5. Knot detail.
As you begin to draw the beans, add three semicircles over the knot.
Step 6. Detail one side of the bow.
On the left side, draw small circles of the same size in turn.
Step 7. Detail the second side of the bow.
Repeat the previous step and draw the same circles on the right side.
Step 8. Color the drawing.
For coloring you will need any pink color.


