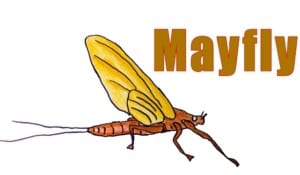
Learn How to Draw a Mayfly step by step easy with this how-to video and step-by-step drawing instructions. Easy animals to draw for children and everyone.
Please see the drawing tutorial in the video below
You can refer to the simple step-by-step drawing guide below
Step 1
To draw Mayfly, start with the body. First, draw a half closed circle with a straight line in the middle.
Step 2
Now, draw the head with two small curves, and another bumpy line to connect both. For eyes, draw a circle in front of the head.
Step 3
Now for the tail. Draw a long curve on the top end at a point as shown. Now, draw a second curve at the bottom with two small feet that come out behind. Finish by putting the curve on top with a ‘V’ shape.
Step 4
Now draw a large circle to form the wings behind the body. They fly very close to the water and live very short!
Step 5
For the front legs, draw two L lines extending into two small legs. Now draw two smaller, smaller tube shapes with rounded tips for the hind legs.
Step 6
Add the veins to the wings by drawing all the lines through them. Also add a few lines in the body and tail for more details.
Step 7
You can color Mayfly’s body with a black and yellow pattern, and a yellow tail.
