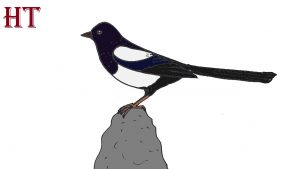
How to draw a Magpie easy with this how-to video and step-by-step drawing instructions. Bird drawing tutorial for beginners and everyone.

Please see the drawing tutorial in the video below
You can refer to the simple step-by-step drawing guide below
Step 1
To start drawing Magpie, draw the pointed beak by creating two small triangles with a bit of space in the bottom right. This bird is considered a lucky charm in China and Korea.
Step 2
Draw the head by creating a curved shape from the beak and add another small curve forming the bottom of the beak.
Step 3
Add eyes by drawing a small circle for the eyes and another small inner circle for the pupils.
Step 4
To draw the body, draw a line down the back. For the front, also make a smooth curve going down, but then bring it in to close the bottom. Magpies can grow to only 50 cm long!
Step 5
To draw the wings, create small curves inside the body with rounded wing tips. Add another small curve at the base of the wing for the feather pattern.
Step 6
Plus my feet draw two straight lines down an angle. Add some small pointed toes at the bottom.
Step 7
Add another leg right behind the front. Remember those long pointed claws!
Step 8
Add two downward lines at an angle for the tail with a rounded tip. Color your Magpie black and white!


