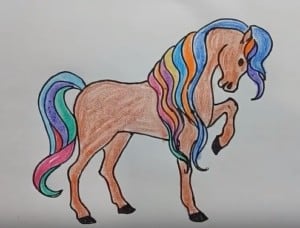
Learn How to draw a cute horse with this how-to video and step-by-step drawing instructions. Easy animals to draw for beginners and all.

Please take a look at the detailed and interesting video tutorial below
Beginners can also refer to the simple drawing tutorial steps below:
Step 1
Start with a tortuous “U” shape. At the bottom of the “U”, add a small line to the lower jaw. Add a short curve in the middle of the line to make the cheeks round.
Step 2
Just above the mouth add a small nose. At the tip of the nose draw a small eye. There are two small ears at the top of the head.
Step 3
Draw a long line for your back. Have a curve, then slightly up and down again at the butt. Add another line to this line just behind the ear to make the line. Under the jaw pull a straight line on the diagonal to make long necks.
Step 4
Keep your back to the hind legs. The hind legs are slightly larger at the top and narrow towards the nail. Draw the front of the hindlimb up and over to make the belly. Rotate the abdomen down and across the front leg. Forelegs have the same length and width as the hind legs. The front of the front leg goes up and connects to the neck. Do not forget the black nails at the bottom of both legs.
Step 5
At the top of the buttocks, shorten the long tail near the bottom of the nail. Draw a hind leg in front of hind legs. Finally, add the bottom of the front leg directly behind the front leg.
Step 6
Finally complete the horse coloring by coloring a lot of colors for the feathers and tail.
You can see more horse drawings:


