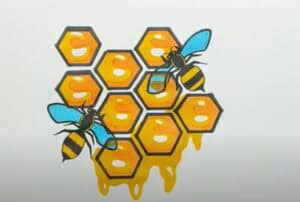
How to Draw a Honeycomb with this how-to video and step-by-step drawing instructions. You will like this guide because it is very easy and consists of only nine steps.

Please see the Honeycomb drawing tutorial in the video below
In this tutorial you will learn how to draw a beehive. These are the tiny cells that bees and wasps make. The hive is needed to store honey and food supplies or lay eggs.
The honeycomb is composed of wax and has an amazing structure. The hives are arranged in even rows and divided into identical cells. Each cell is a regular hexagon.
In this tutorial you will draw some small plots. It won’t be difficult, because the lesson is tailored for novice artists, but you will need to be able to create straight lines. All tiles have the same structure and size, so you just need to draw one and you will draw the other tiles according to the same principle.
Honeycomb Drawing Step by Step
Step 1. Draw the first cell.
To do this, draw a regular hexagon.
Step 2. Add a second cell.
Sketch a few more lines to form the same hexagon.
Step 3. Draw the third cell.
Repeat your action in the previous step and draw the tile on the other side.
Step 4. Outline the fourth cell.
Add three lines at the bottom as shown in the example.
Step 5. Draw the fifth cell.
Draw four lines to the side and you get the fifth square.
Step 6. Add a sixth cell.
Repeat the previous step on the other side.
Step 7. Draw the seventh cell.
Draw the last cell by adding three lines at the bottom.
Step 8. Outline the inner border of the cells.
In this step, draw a small hexagon in each cell.
Step 9. Color the drawing.
Use beige for the inside and yellow for the border. Add white highlights in each cell.
You can see more drawing:


