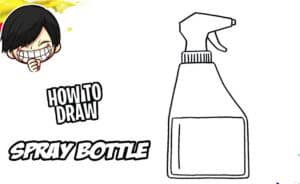
How to Draw a Spray Bottle with this how-to video and step-by-step drawing instructions. I promise that this tutorial will be very easy for you and will help you improve your artistic skills.
Please see Spray Bottle drawing tutorial in the video below
o In this lesson, I want to tell you how to draw a spray bottle. The drawing object in this lesson is a household item that each of you probably already knows. This lesson consists of nine very simple steps that any child or beginner can do.
An aerosol is a liquid that is forced out of a special container under pressure so that it becomes a cloud-like drop of liquid.
So, to start the following steps, you need to prepare your drawing material first.
Spray Bottle Drawing Step by Step
Step 1. Draw the bottom of the spray bottle.
This step will be very easy for you as you should only draw a horizontal line.
Step 2. Add the sides of the spray bottle.
To do this, draw two vertical lines of the same size.
Step 3. Describe the bottleneck of the spray.
Continue the previously drawn lines with two oblique lines.
Step 4. Add the cap.
Outline a rectangle at the top of the spray bottle you drew.
Step 5. Add one more element.
Above the rectangle, draw a shape similar to a rectangle without sides.
Step 6. Start painting the spray can.
Draw a shape consisting of line segments of different sizes.
Step 7. Complete the aerosol drawing.
Detailed description as a rectangle without edges.
Step 8. Draw the handle of the spray bottle.
To draw this element, you should use straight lines.
Step 9. Color the drawing.
You should use shades of blue to color the spray you drew.

