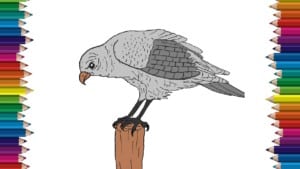
How to draw a hawk easy step by step with this how-to video and step-by-step drawing instructions. How to draw a bird for beginners and everyone.

Please see the drawing tutorial in the video below
You can refer to the simple step-by-step drawing guide below
Step 1
Start drawing hawk. Draw an “U” upside down. In the top left corner add a small sharp beak. Point of the mine down.
Step 2
Draw big round eyes right after the mine. Add short lines below mine to make mouth. There is a curve from the left of the “U” line on the left almost to the right.
Step 3
Next draw a long curve down the back. It starts at the right end and curves out and slightly at the bottom.
Step 4
From the bottom of the line to the left draw the belly bent down with a small bump at the bottom for the legs. Now add wings. Start right below the head and bend the wings almost straight to the abdomen and down a corner along the abdomen. The lower part of the wing extends below the following line. Then it curves back to join with the following line.
Step 5
At the bottom of the bump on the belly line draw claws on the legs. The front foot has two sharp claws on the front and a sharp nail on the back. The other foot is slightly behind the first foot. Add a Talon to the back of the back foot. At the bottom of the wing add some long tail feathers. The jagged roads connect to the back road.
Step 6
Finally draw two straight lines to create a branch for the hawk. Color the hawk so it looks more realistic


