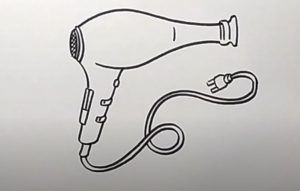
How to Draw a Hair Dryer easy with this how-to video and step-by-step drawing instructions. Easy drawing tutorial for beginners and kids.

Please see the drawing tutorial in the video below
You can refer to the simple step-by-step drawing guide below
Step 1
So first draw the outline of the hair dryer body like in our example.
Step 2
Now, use a pair of curved lines to draw the contours of the hair dryer’s handle.
Step 3
Here we draw the bottom of the handle and part of the rope (you can draw the whole wire this way).
Step 4
Draw the front grille, controls and design lines on the body of our hair dryer.
Step 5
Now we need to enrich our drawing. To do this, we will use hatching (as we always do).
Today we have shown you how to draw a hair dryer. If you enjoyed this lesson, visit the “Electronics” category on our website.


