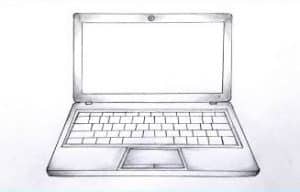
How To Draw A Laptop easy with this how-to video and step-by-step drawing instructions. Easy drawings for beginners and kids.

Please see the drawing tutorial in the video below
You can refer to the simple step-by-step drawing guide below
Step 1
Start by making the base of the laptop rectangular.
Step 2
Using that one shape, draw the base, then draw the outline of the screen as you see here. It is like an open book.
Step 3
Sketch in some dash as lining to show the thickness of the laptop, then draw in the touchpad and the right and left mouse buttons.
Step 4
Here you will draw in the actual screen framed by the body of the computer. Once that’s done, create a narrow rectangle for the keyboard area. Don’t forget to add the camera above the screen.
Step 5
Finally, just draw the keys for the laptop’s keyboard, then start erasing any messy guides or outlines you’ve drawn from start to finish.
Step 6
This is what your drawing will look like when you’re done. Now you can color in the notebook any color you like. You can actually color it in pink if you want as these days you can actually buy pink laptops.


