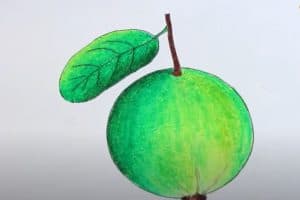
How to Draw a Guava easy by color with this how-to video and step-by-step drawing instructions. How to draw fruits for beginners and kids.

Please see the drawing tutorial in the video below
You can refer to the simple step-by-step drawing guide below
Step 1
We just talked about how to draw geometric shapes. You can see the wrong circle in this step. We are talking about a circle that is slightly extended vertically with a pointed tip above. You can first draw a regular circle and then deform it a bit. You can also draw a shape like in our template without any preparation.
Step 2
At the highest point of the circle, draw a vertical line. Next to this line, we draw the outline of a long narrow leaflet. We connect the vertical line and the contour of the leaflet. So we have a rough silhouette of a tropical fruit that we paint
Step 3
Small details always make up the overall look. You may notice this even during pretty difficult drawing lessons. A great example is a lesson on how to draw a rose. So now we are going to work with the small details of our guava. Draw on top of the fruit a few oblique lines converging to a point. Let’s turn the stem upside down and draw veins on the leaves.
Step 4
We had a very beautiful guava. We had a very beautiful guava. And we will work with the shadow to make this fruit more realistic. We paint dense depth shading on the top and bottom edges of the fruit. Note that the hatch is not on the edge.
We just drew a tropical fruit called guava. It doesn’t have a strong difference from grapefruit or orange. Of course, we just want to talk about drawing techniques.


