How to draw a girl wearing cap by Pencil with this how-to video and step-by-step drawing instructions. Girl face drawing for beginners and everyone.
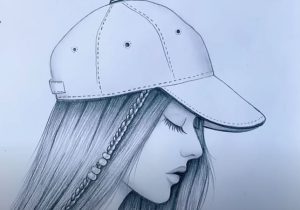
Please see the drawing tutorial in the video below
► Used things:
1. Pencil Name – DOMS ( ZOOM ULTIMATE DARK ) Pencil / 2B Pencil.
2. Paper Name – Double A Offset paper.
3. Blending Stump (You can use Paint brush, Tissue Paper or cotton buds instead of this blending stump.
Girl wearing cap Drawing Step by Step:
Step 1. Basic outline:
Start by drawing a simple oval for the head. Then, lightly draw a horizontal line across the oval, slightly below its center. This line will be at the girl’s eye level. Next, draw a vertical line that intersects the horizontal line. This will help you place the facial features correctly.
Step 2. Face and facial features:
Sketch the basic features of the face according to the instructions. Place the eyes on the horizontal line, the nose vertical and the mouth below the nose. Remember to keep the lines light and simple for now.
Step 3. Hair:
Draw the girl’s hair around the head. Since she wears a cap, her hair may be partially hidden. Draw the hairline and general shape of the hair flowing down the sides and back of the head.
Step 4. Hat:
Now draw the hat on top. The hat should be slightly above the girl’s eyes. Start by drawing the brim of her hat to create shadows over her eyes. Then draw the top of the hat, which can be rounded or specifically shaped based on the style you prefer.
Step 5. Refine facial features:
Return to facial features and add details. Define eyes, eyebrows, nose and lips more clearly. Remove any unnecessary instructions that you no longer need.
Step 6. Neck and Shoulders:
Lengthen the neck down from the head and outline the shoulders and upper body. This will give your drawing more context and make it look more natural.
Step 7. Clothing details:
Add some details to the girl’s clothes, such as a shirt neckline or any visible collar. Keep in mind that some parts of clothing may be hidden behind a cap or covered by hair.
Step 8. Finalize details:
Add more subtle details throughout the drawing. Darken the lines needed to give depth and definition to the hat, hair, and clothing. Shade areas with shadows, especially under the brim of the hat and where the hair casts shadows on the face.
Step 9. Shading and Texture:
Add shadows to create depth and realism. Use your pencil to create smooth gradations in the shaded areas. Pay attention to the texture of the hat, hair, and clothes. Hats often have a slightly rough surface.
Step 10. Final Steps:
Take a step back and evaluate your drawing. Make any necessary adjustments to ensure proportions and features look balanced and correct. Delete any remaining instructions that are no longer needed.
