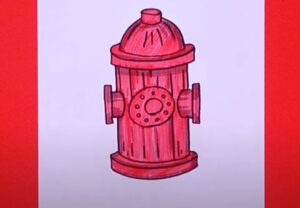
Now you have to complete a fun and useful lesson, which details how to draw a fire hydrant step by step. In this lesson, you will practice drawing simple geometric shapes, and you will also use your spatial imagination, which is also an effective practice.
A fire hydrant is a device that allows you to connect equipment to provide water in the event of a fire. It is an important fire safety device. Fire hydrants are used in places where water pipes are available. Externally, the faucet looks like a faucet, if necessary, a special hose is connected to supply water to the fire area. The fire hydrant consists of several elements that are interconnected. Sometimes a fire hydrant is used for household needs.
Fire Hydrant Drawing Step by Step
Step 1. Draw the edges.
Draw vertical lines at some distance from each other.
Step 2. Description below.
Draw a smooth connecting line at the bottom and add bottom brackets.
Step 3. Start drawing the top part.
Add two smooth lines as shown in the example.
Step 4. Add the widest vertex.
Draw two short vertical lines on either side and add a seam between them.
Step 5. Sketch the cap of the faucet.
The shell is dome-shaped and consists of several interconnected elements.
Step 6. Draw the edges.
Draw some rectangular elements on the sides, while maintaining symmetry.
Step 7. Sketch the lace knob.
In the middle of the body, draw several circles of different diameters.
Step 8. Detail the surface of the allowance.
Using thin strokes, draw reliefs on the lid and draw vertical lines on the body.
Step 9. Color the drawing.
For coloring, use different shades of red.


