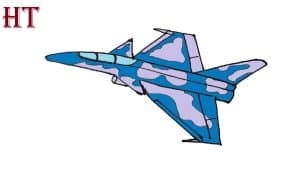
How to draw a Fighter Plane easy with this how-to video and step-by-step drawing instructions. Easy drawing tutorial for beginners and kids.

Please see the drawing tutorial in the video below
You can refer to the simple step-by-step drawing guide below
Step 1
Start by drawing two diagonal, roughly parallel curves. This starts the fuselage, or fuselage, of the jet.
Step 2
Join the lines drawn in the previous step by extending two long curved lines and allowing them to meet at a point. This forms the nose of the jet.
Step 3
Next, draw the upper part of the tail, also known as the vertical stabilizer. Extend two lines on a vertical incline from the back of the jet. Connect them at the beginning and the end using straight lines.
Step 4
Use a series of straight lines to enclose the back of the fuselage. Then enclose a circle using a curved line. Trace the shape with short lines. This forms the nozzle, or rear section, of the jet engine.
Step 5
Next, draw the front part of the wings, erasing the guide lines if necessary. Extend two straight segments from each side of the jet and connect them with a short line. Note that the small wings have an almost triangular shape.
Step 6
Draw wings. Use three straight lines to enclose the wings on each side of the jet. Each wing must resemble a triangle with one of its corners removed.
Step 7
Draw small wings at the tips of the wings. Extend a line from the wing and a line parallel to it. Join the lines at each end.
Step 8
Contour the jet fuselage by drawing long, curved lines in the center.
Step 9
Draw the windows of the cockpit. Wrap some irregular shapes.
Step 10
Color your jet. Many fighters like this one come in silver or gray, but they also come in a multitude of shades. Stealth jets like the Lockheed SR-71 Blackbird can be solid black; Blue Angels, US Navy demonstration squadron, blue and yellow jet pilots; and historically, many pilots have painted different pictures on the sides of their planes.


