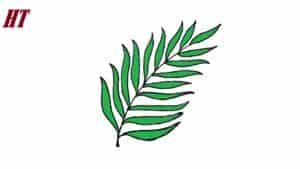
How to draw a fern leaf with this how-to video and step-by-step drawing instructions. Easy drawing tutorial for beginners and everyone.

Please see fern leaf drawing tutorial in the video below
I am happy to present to you a new fun drawing lesson on how to draw a fern. This lesson will definitely be useful to you. I promise you that this tutorial will make it easy for you to finish as it was created specifically for kids and beginner artists.
The fern is a beautiful plant that is considered one of the most ancient. Ferns appeared on earth about 400 million years ago, when it was still inhabited by dinosaurs. These trees can reach 15-20 meters in height. There are many different types of this plant.
So, to draw a fern, you need to first draw the trunk of this plant, and then draw its leaves. Now it’s time to prepare the materials you need to draw, and then you can start this lesson.
Fern leaf Drawing Step by Step
Step 1. Draw the fern’s trunk.
Describe this element with a long, slightly curved line.
Step 2. Start drawing fern leaves.
On the top of the drawn stem, draw three pointed fern leaves.
Step 3. Sketch two sheets of paper.
Describe two identical pointed leaves on either side of the stem.
Step 4. Draw two more sheets.
Below the previously drawn leaves, draw two more fern leaves similar to them.
Step 5. Draw some more leaves.
Add another pointed leaf on one side of the stem and two leaves on the other side.
Step 6. Draw three more leaves.
Add two pointed fern leaves on the left and one on the right.
Step 7. Draw two more sheets
Below the previously drawn fern leaves, draw another leaf on either side of the stem.
Step 8. Add the last two sheets.
At the bottom of the drawn fern, add two leaves using curved lines.
Step 9. Color the drawing.
To color the fern, use green.


