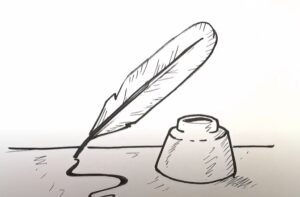
How to Draw a Feather Pen (Quill pen) with this how-to video and step by step drawing instructions. Grab some art supplies and follow along with these clear 6 drawing steps.

Please see Feather Pen drawing tutorial in the video below
You can refer to Feather Pen simple step by step drawing guide below
Step 1. Shaping the axis
Forms the thin shaft of the brush.
Step 2. Attach the brush
Next, extend the shaft by drawing two straight lines to form the brush.
Step 3. Sketch the shape of the feather
Sketch the elongated shape of the feather around the shaft similar to the illustration.
Step 4. Draw the barbs
Draw curved lines extending outward from the shaft to form the prongs.
Step 5. Create the nib
Create the tip of the brush by drawing a pointed shape as shown.
Step 6. Complete the brush drawing
It’s time to add some color to our brush drawings! First, color the fur with a white pencil. Now shade the shaft and brush with a brown pencil. Then, use a darker brown color to fill in the nib.


