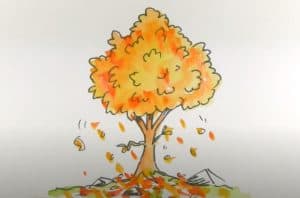
How to Draw a Fall Tree easy with this how-to video and step-by-step drawing instructions. Tree drawing tutorial for beginners and kids.

Please see the drawing tutorial in the video below
You can refer to the simple step-by-step drawing guide below
Step 1
Start by drawing a large “V” shape using long, curved lines. Notice that the edges of the “V” are not straight, but wavy. Draw a short curved line extending from one side of the “V.” This forms the basic outline of the branches.
Step 2
Draw another set of long, curved lines. The lines are parallel to each other below the “V”, then diverge to follow the contours of the “V” shape before meeting the lines of the “V” at the sharp points. Draw some short, curved, overlapping lines to enclose the lower part of the shape. This forms the trunk of the tree.
Step 3
Draw curved lines of different lengths extending from the upper branches. Allow some lines to branch further, using shorter curves.
Step 4
Using two lines, draw another wide branch extending from the trunk. Then draw more branches using curved lines.
Step 5
Not yet, the leaves have fallen. Draw leaves lining all branches of the tree. For each leaf, use two short, curved lines, attaching to the branch at one end and meeting at a gentle spot at the other.
Step 6
Draw a dense mass of leaves behind the detailed leaves just drawn. Wrap the irregular shape using short, curved lines, allowing this to meet at jagged points.
Step 7
Give the plant some ground to stand on. Draw a horizon line using short short strokes. Draw leaves falling from the tree. For each leaf, wrap a small teardrop-like shape.
Step 8
Fill in any blanks with additional twigs, branches, and leaves. Texture and detail the trunk using curves of different lengths.
Step 9
Draw the second horizon after the first. Texture the ground with curves and waves, and also sketch some leaves falling on the ground.
Step 10
Color your fall trees. Will it be golden yellow or bronze, orange red or brown? The choice is yours.


