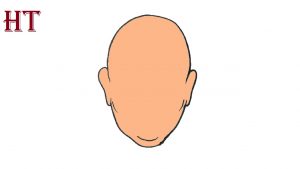
How to Draw A Face Shape easy with this how-to video and step-by-step drawing instructions. Easy drawing tutorial for beginners and kids.

Please see the drawing tutorial in the video below
You can refer to the simple step-by-step drawing guide below
Step 1
To get started with this face shape tutorial, you’ll need a light pencil, a ruler, and a compass if you have one.
We’ll use a pencil for this part, as these shapes will be there to guide you instead of shown in the final image.
Using the reference image as a guide, carefully draw two intersecting ovals. The one at the bottom will form the jawline of the face, and will be slightly longer and thinner.
The top oval will form the top of the head and will be slightly shorter and rounder.
Then, using your ruler, simply draw a line down the vertical centers of the two ovals. Then draw another one on the horizontal center.
After you have it like the reference image, you’re ready to move on!
Step 2 – Draw the top line of the head
You can start using your brush for this part of your face shape drawing. However, you should still keep your pencil guide shape for now!
Using those guide shapes, carefully draw a curved line over the top of the upper oval. This line will extend until it touches the horizontal line.
Step 3 – Now add some ears to your face shape drawing
We’ll be drawing some ears in this step of the face shape tutorial. The ears will start from the curve you drew for the top of the head.
It will also start slightly above the horizontal guide. These ears will be drawn with a curved line with two protrusions and they will connect to the bottom oval of the face.
Step 4 – Next, draw the jawline
Your face shape drawing is really starting to come together! For this step, we will draw the jawline of the face.
The jaw will start slightly above the lower part of the ear and extend down along the bottom oval of the face. Because according to that oval shape, the jaw must have a rounded end at the bottom.
At this point, you won’t need the pencil guides anymore, so you can go ahead and erase them. However, be sure to let the ink dry completely before you start erasing!
Step 5 – Now you can finish with some final details
You’ve finished sketching the face, so now we’re going to add some final details in this step of the tutorial on how to draw a face shape.
Using some curved lines, you can draw the cheekbones of the face, and then create some chin detail at the bottom. With that, you’ve finished the drawing part of this tutorial!
Before moving on to the final step, you should add any additional details that you want. If you’re feeling creative, you can go a step further and draw some details on the face.
If you’re not sure how to do that, remember you have the perfect model: your own face! You can use a mirror or a photo of your own face to draw some details for this picture.
Or, you can use a picture of a favorite celebrity or family member to help you. Who will you draw for this picture?
Step 6 – Finish drawing your face shape with some colors
That brings us to the final step of drawing your face shape and that’s where you get to have fun coloring!
If you simulate this face to a real person, then you can use different coloring tools and media to reproduce their skin tone for your drawing.
If you don’t want the image to be more realistic, you can always make it more stylish with some bright and vibrant colors! You really should let your creativity flow as you color it.
Once you’ve chosen the tone you want, you probably have some fun art mediums to choose from.
Watercolor paints can be a good choice as they are great for creating skin tones, but what other artistic tool are you thinking of using for this painting?


