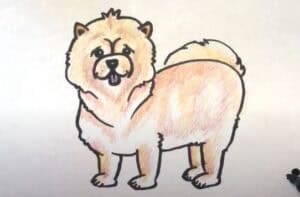
How to Draw a Chow Chow Dog with this how-to video and step-by-step drawing instructions. Dog drawing tutorial for beginners and all.

Please see Chow Chow drawing tutorial in the video below
Chow Chow Drawing Step by Step
Step 1
Create two shapes with both circles. The top one is smaller than the one for the body. Add face guides and move on to step two.
Step 2
Sketch in the liner for the chow’s outline. This must be a very sharp hit because as you know the chow is a very fluffy dog. Draw short ears and add some details to the top of the head.
Step 3
Start sketching on the chow’s face, starting with the slanted eyes, then draw the muzzle also short and slightly upturned inward. The lower jaw opens and the lips or gums are long and drooping. Draw a tongue and sketch some details to add texture to the dog’s coat.
Step 4
Draw the front pins and make sure they are thick, wide, and eye-catching. Sketch each paw that looks huge too, then draw some details for the shoulders and chest. This will also add texture and definition to the dog.
Step 5
For the final step, all you have to do is finish drawing the body starting from the chest, abdomen and hind legs. Draw the long curled tail and make sure it rests on the back, then draw the hind paws. Clean up the drawing to free it from mistakes and instructions.
Step 6
This is the finished artwork when you’re done. Now you can go ahead and make your chow look like the one you adopted as a pet or one you want one day to have.


