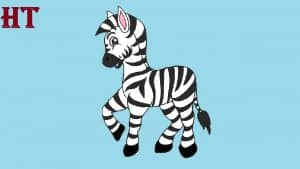
How to draw a Cartoon Zebra cute and easy with this how-to video and step-by-step drawing instructions. Easy animals to draw so cute for Beginners and kids.

Please see the drawing tutorial in the video below
You can refer to the simple step-by-step drawing guide below
Step 1
Start off by drawing a circle. This will form the zebra’s head.
Step 2
Draw a smaller circle near the first shape. This will form the zebra’s snout.
Step 3
Draw a large, rounded rectangle to form the zebra’s body. Start by drawing two horizontal, parallel lines. Then, connect the lines with two curves.
Step 4
Connect the muzzle to the head and head to the body, using two pairs of straight lines.
Step 5
Remove guide lines from head, neck and body.
Step 6
Draw the legs. For each leg, draw a set of long, straight, parallel lines going down from the body. Connect the lines at the bottom with a short, straight line, thus encircling the long and narrow rectangles. Point out the hooves by drawing a short, straight line through the lower part of each leg. For the proximal legs, draw a set of curves at the ends of each leg, indicating the shoulders and hips.
Step 7
Add details to your zebra. Draw two curved triangles that extend from the head, forming the ears. Draw a long, curved line from the top of the head to the back to form the mane. Finally, stretch two parallel curves from the hips to form the tail. Allow the diverging lines at the end and connect them with a short, curved line. This shows the hairs at the tip of the tail.
Step 8
Erase guide lines from legs, ears and tail.
Step 9
Each zebra must have stripes. Draw thick and curves along the mane, legs, and tail. Shade the top of the tail. On the neck and back, draw curved, narrow triangles and shade inside the shapes. Finally, give your zebra a smile. Draw a curve over the end of the muzzle and another curve to indicate the mouth.
Step 10
Color your zebra. Zebras are white with black or brown stripes.


