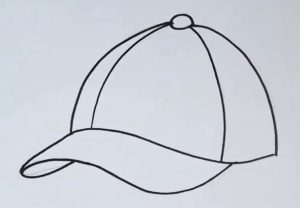
How to Draw a Cap Easy with this how-to video and step-by-step drawing instructions. Easy drawing tutorial for beginners and kids.

Please see the drawing tutorial in the video below
You can refer to the simple step-by-step drawing guide below
Step 1
First, we will draw a circle. The top part of the figure looks like something similar to a square with rounded edges and the bottom should be flat. It is important to remember that the lines of the initial steps should be as light as possible to make the process of adding modifications much easier.
Step 2
What we can’t imagine any hat with is definitely the visor. Therefore, in this step we will draw the outline of the visor. We draw a cap with a straight top, but you can of course draw a cap with a curved top, very long or short.
Step 3
Now let’s draw a button at the top. Now, using a few simple lines, draw diverging seams from the node at the top down to the edges of the top cap.
Step 4
Now we will draw the outline of the logo. You can draw your own version of the logo. For example, it could be a sign of Superman’s or Wolverine’s claws. Here we need not only to remove the unnecessary lines, but also to redraw all the necessary lines to make the drawing clear and clean.
Step 5
In the last step of this drawing lesson on how to draw the lid, you just need to erase the unnecessary guides and draw the light shadow. Shadows will make your hat drawing look more realistic and massive.
Today we have shown you how to draw a lid. We are trying very hard to draw more tutorials for you. If you like it, don’t forget to visit our Facebook page.


