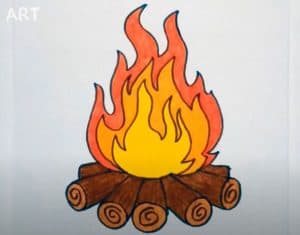
How to Draw a Campfire easy with this how-to video and step-by-step drawing instructions. Easy drawing tutorial for beginners and kids.

Please see the drawing tutorial in the video below
You can refer to the simple step-by-step drawing guide below
Step 1
To draw a campfire, we first need to outline the location and shape of the firewood. In our case, these are three large records, connected by their upper ends. You can choose any shape and thickness of firewood for your drawing. Don’t try to draw this firewood with perfectly straight lines. You can lose a lot in realism in this case.
Step 2
Well, we already know exactly where our fire is. Now we need to rough outline the contours of the flame. If you paint a flame too big, it will be like an artificial fire source. Use short, wavy borders. Avoid crushing the pencil.
Step 3
Great, we now have a rough draft of the whole picture. Now we can work with details to make our campfire look awesome. To start doing this we will add a wooden texture to our firewood. In fact, these are simply short lines parallel to the edges of each log. These lines are not completely straight. Don’t draw these lines too much.
Step 4
Now let’s paint lightly the details of the fire. Actually, we just need to add a bit of smooth curves inside the path we drew in the second step.
Step 5
Fire has always been quite a difficult object to draw because working with fire involves working with shadows and lights. We’re not going to create complicated shadows, but the basics we need to define. Fire is the source of light, meaning that in places directly exposed to fire, firewood should be the lightest. In the vicinity of the fire we do not use hatches and do not apply shadows.
How to draw a campfire Here’s a pretty short drawing tutorial. We hope you get a great result. Don’t forget to leave your comments about our work in our social networks or in the direct comments section below this post. This is the best salary for our job.


