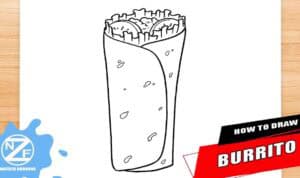
How to Draw a Burrito with this how-to video and step-by-step drawing instructions. Easy drawing tutorial for beginners and kids.

Please see the Burrito drawing tutorial in the video below
So I am happy to bring to your attention this drawing lesson in which I will tell and show you how to draw a burrito step by step. I’ve created this lesson specifically for beginner and child artists, so you can proceed with it safely and without fear that you’ll run into complications. Here is another fascinating drawing lesson dedicated to images of different dishes and foods.
Burrito is a traditional Mexican dish stuffed with meat or vegetables wrapped in soft corn or wheat tortillas. Meat, corn, beans, vegetables, herbs and cheese can be used as fillings. The main feature of burrito is that it can be made from many different ingredients, creating many different variations for the dish.
When drawing burrito with this tutorial, you will first draw the baked product and then draw the filling. After learning how to draw a burrito with the help of this drawing lesson, you will be able to supplement any other still life or drawing you drew with this in the future.
Burrito Drawing Step by Step
Step 1. Draw the outline of the bread.
To complete this step, draw a shape as shown in the figure, use a curved line for this.
Step 2. Continue drawing the cake.
Inside the previously drawn shape, draw a curved line, placing it diagonally across the shape.
Step 3. Finish drawing the cake.
Now you need to draw an arc inside the outline of the shape you drew in the first step.
Step 4. Sketch the tomatoes.
At the top of the drawn elements, draw two tomatoes, using arcs and curves for this.
Step 5. Continue drawing the burrito.
Near the tomatoes drawn earlier, draw a wavy line, as shown in the figure.
Step 6. Add lettuce leaves.
Next to the previously drawn wavy line, add a few wavy lines of different lengths.
Step 7. Color the drawing.
To color the burrito, you can use beige, brown, red and green.


